Pages

Showing posts with label bees. Show all posts

Sunday, August 11, 2013

Day 32: Building hives

We got a lot done today! I finally got to build my own hive, something I really wanted to accomplish while I was here. 
Giant green lizard (considered bad luck by many here):
 We planted pineapple tops today. Any time they buy pineapples, they save the tops to be planted on the farm. Many have already been planted, but we pulled up any that died or were rotten. We replanted the new tops among rows of sweet pepper. We did it today because the soil was nice and soft after the rain last night. Necessary items are a bag to carry the pineapple tops in and a cutlass to dig the hole:


 Here is a close-up of a pineapple growing on the farm:
 Me planting the pineapple top into the ground:

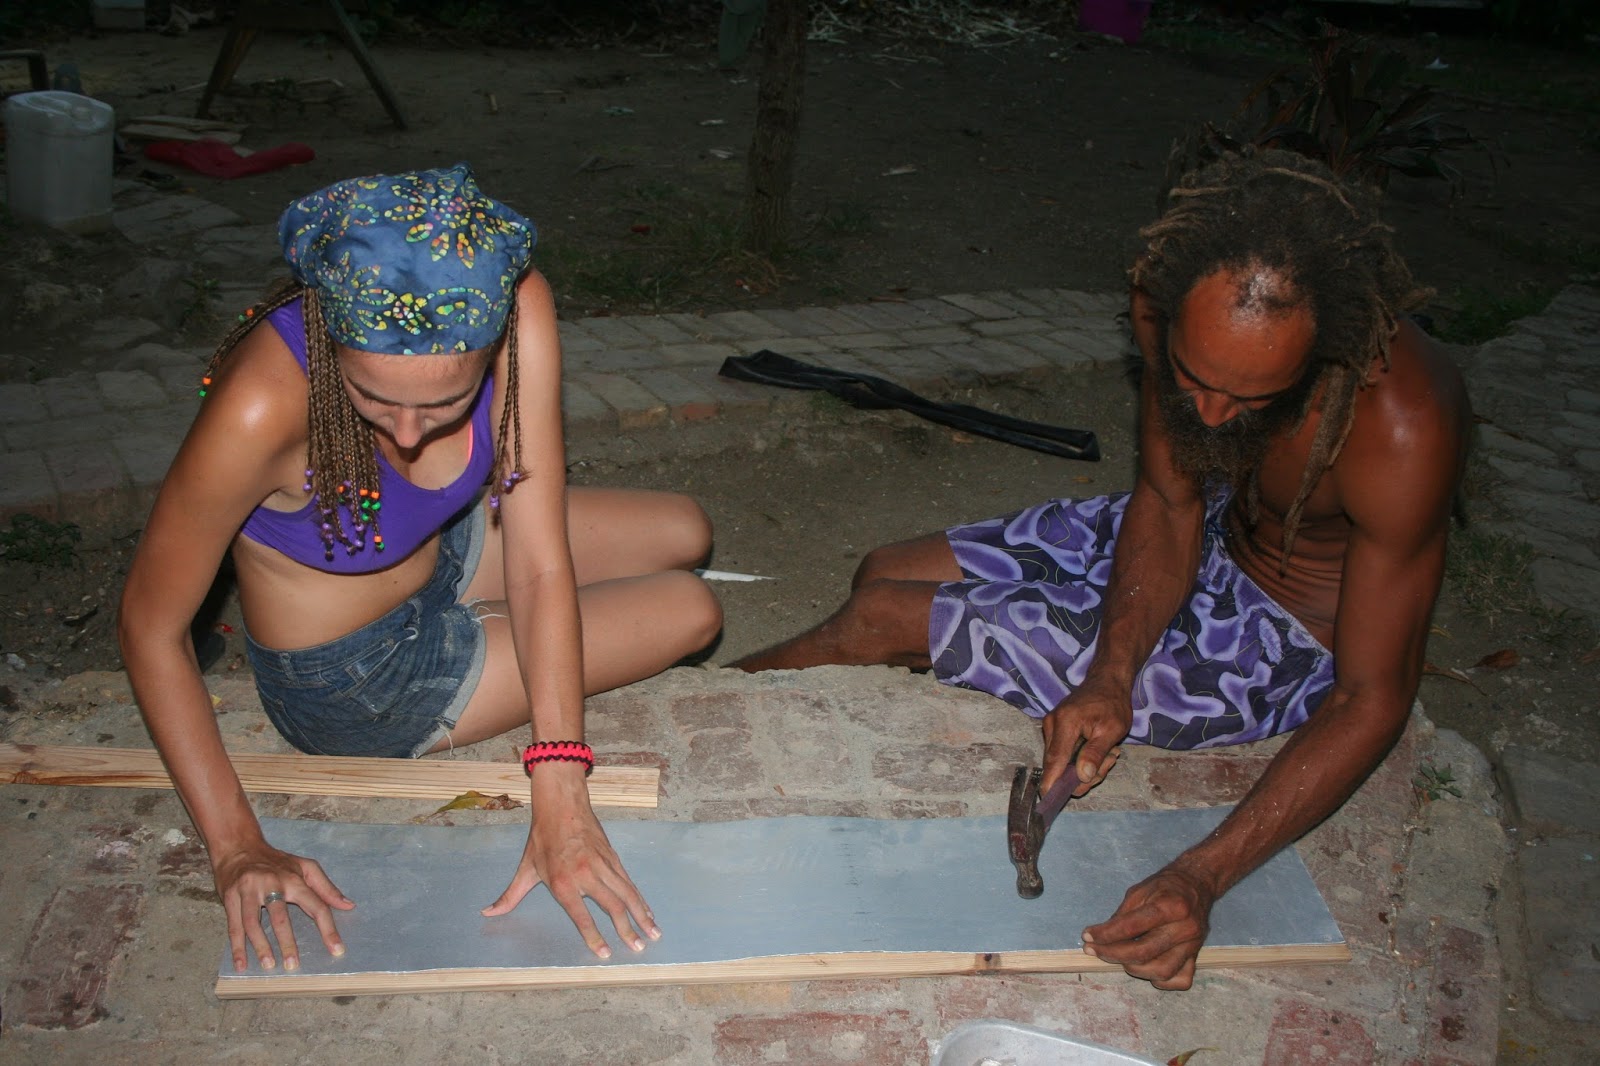
 Kwao helped me build a hive today. We marked up two boards for the two sides and two faces of the hive. I learned how to get the right angle for cutting out the faces (60 degree slant). We used a skill saw and a table saw, both of which I learned how to use safely.


 Once we cut out the sides and faces, we put them all together. It is a little tricky to hold up the face to the side and get the nails in at an angle. We pre-drilled the holes that the nail would go into and it made things a lot easier. It helps to have another person as well to hold the face and side together at the corner.

 Nailing the side to the face was easier after the first nails were in:
 Here one side is attached to the front and back face (upside down):
 We used top bars to prop up the hive as we nailed it. You can see the entrance of the hive cut out in the closest face:

 Kwao holding it together as I drilled the holes:
 Lots of marking was needed so a square was a very useful tool to have:

 The finished hive! I used pieces of wood instead of one long piece for the bottom because it is what we had:
 I also nailed pieces for the bottom of the tin-sided hive that we put together last week:
 I'm really glad that I got to put together an entire hive, from beginning to (almost) the end. We still have to make a cover and top bars. But, I learned invaluable tricks for the carpentry and for assembly. I went with Kwao and a handful of boys to gather mangoes across town. At the end of the day, we had a fantastic dinner. Mangoes and dinner:
 Me and my "constant companion" Enoch who never fails to ask me to read him a book, play cards, or take a picture of him any time he sees me:

 Dinner was rice, coconut milk with sweet and spicy pepper, salad, broccoli with garlic sauce, and avocado pear. Absolutely delicious! Also, there was chocolate biscotti "camping style" for dessert. Yum!

Day 31: Bee talk

The family that was staying left this morning, but not without peeking into the bees first. I love hearing the reactions from people who have never gone into a hive before. They always say that it was very interesting and that they had never seen anything like it before. I also explained that crystallized honey doesn't have to be thrown away (always make me cringe when people mention they do this). But, I'm glad some bee love was shared around and some questions answered. It's funny how explaining bees or beekeeping always takes an explanation about their behavior or how the colony operates. Everything they do is very interconnected and answering a question about honey takes some extra explanation of bees.


Thursday, August 8, 2013

Day 29: More bee bites, animals, and food

Went into the bees this morning. The queen rearing nuke had a colony that absconded suddenly. There were a few ants left in the hive, but it was still a mystery as to why they left. One colony was fine and the other was unfortunately queenless. The queen cell that we had given them never emerged and the larvae inside the cell was mummified. When feeding two other hives, we found a good frame of brood to give to the queenless hive in order to encourage them to make queen cells.
Here are some random pictures from the day.
A tiny frog:
Cocoa nut that I tried for the first time. The seed is sticky on the outside and bitter tasting:

I also had fish soup today! Jessica showed me how to make it. Basically, she boiled a few fish heads in water over the stove. Then, she added yam, potato, green onion, carrots, and herbs. It was delicious:

I also spent some time peeling beet roots today for beet root juice. Yummy when it is ice cold:
Another (bigger) frog:

Wednesday, August 7, 2013

Day 28: Propolis and visitors

Made a propolis tincture today! The family had a ball of propolis in the freezer that they had collected. I made a propolis tincture with rum and shaved propolis. Basically, I grated the propolis finely and added it to about 5in of rum in a rum bottle. Then, I let it sit out in the sun all day. It is supposed to be really good for you for many reasons including minerals, anti-inflammatory etc.
The shaved propolis:
 The rum bottle with rum:
 Me grating the propolis:
 The mixture:
We had a pretty slow day today because we had some visitors come to stay.
Here is a picture of a tiny lizard:
I also went to the beach with lots of local people today. Later, I made more sugar syrup but the kitchen was full of ants. Kwao said that means it might rain soon.

Monday, August 5, 2013

Day 27: Bee bites and candles

Went into the bees this morning to take out the plastic feed bags. Might as well not make them work hard to get all the plastic out. Plus, we did some hive inspections while we worked. I learned the difference between a queen cup and a queen cell. Queen cups are built in preparation for a new queen to be laid. Queen cells are when the egg has been lain inside, which is capped 9 days later. Then, she emerges on day 16. Unfortunately, I got a bee sting on my wrist. They call them "bee bites" here but it means a bee sting. It didn't hurt to badly but limited my wrist movements for the rest of the day. 
My swollen hand:
I helped around the house today becuase there is a family coming to stay for a few days tomorrow. I painted the lower cabin and the entire kitchen. The kitchen included the fridge which rusts quickly becuase we are so near the ocean. 
Me painting:
 Close-up:
 We also made candles today with the wax we rendered! We melted the wheel of wax over the stove. We prepared the molds which meant cleaning them out and then placing the wick. This was tricky because the wick had to be straight and sit inside the mold. We tied the wick to a stick across the top to hold it in place.
Me tying the wick to a stick over the mold:
 Melting the wax:
 Me pouring the wax into the mold:
 Pouring the wax into the mold, which had a toothbrush instead of a stick to hold the wick:
 Enoch and I watching Kwao put the top-bar hive we worked on yesterday together. He nailed the front and back onto the sides:
 Nailing the side to the front is tricky because the side has to be held above the ground:
 The finished candles! We didn't put the wick in correctly on the big one but we are going to melt it down and try again...

Sunday, August 4, 2013

Day 26: Sand and wax

Sifted sand this morning. We were all in a funk so Agape asked me if I wanted to do some hard work. It actually worked, too! (Don't get any ideas, parents). Anyways, we sifted sand, got our muscles and blood moving and it woke us up pretty well. We shoveled gravel into a sifter and sifted the fine sand into a pile. That sand went into bags (white bags) for use later.


 Agape told me to smile at least once:

 The onlookers, quite happy playing with old bike tubes:


We also rendered wax today! I have  been waiting to do this myself to see how easy the process was. It turned out to be very easy.I had gathered some yucky wax from feeding hives yesterday. During inspections, I often have to cut off comb, old comb, or side comb. We end up keeping it so that we can render it all later.
The bag of wax and the pillow case we used:
We boiled the wax in  about 4 inches of water on the stove, nice and hot until it boiled:
 It was hot in the kitchen, we had some visitors:
 After boiling the wax, we poured it into the pillowcase. The pillowcase went into a five gallon bucket which had a small hole on the side right next to the bottom. The part I did not realize was throwing out the initial liquid. We threw out the liquid that first came out of the bucket becuase it was mostly water. Agape showed me how to watch out for the indications of wax like oily surface and it sticking to the sides of the bowl. Once wax started to come out, we pressed the wax out of the pillow using a wooden device that fit into the bucket (there is a picture of it on the previous post about rendering wax).
The bucket system:
 Afterwards, we let the wax sit in the bowl until it cooled. The result was a wheel of wax that was mostly clean. Any debris that came through sank to the bottom of the bowl with the water as it sat. The wax can be melted again and filtered after this.
The wheel of wax:
 Dumplings for dinner, my favorite (as I've mentioned before). I love when there is a huge pile of them:
Kwao and I started on building a new hive using scrap tin for the sides. It got dark pretty quickly but we measured, cut, and assembled the two sides with tin and a wooden frame. Hopefully it will turn out alright becuase the tin was not square and it was a little off in nailing it together. Also, to avoid splitting the wood (if you are using wood that splits, which we were: pineboard) here are two helpful hints: turn the nail over and hit the tip a few times to dull it and don't put the nails in a straight line on the same grain of the wood. Kwao and I both liked the look of tin and wood becuase it turned out really sleek looking. We will build the rest of the hive tomorrow.
Nailing one side together: